Feathr Python Project Developer Guide
Installation
- Navigate to feathr_project folder
- Install the project by
python3 -m pip install -e .This will install a feathr CLI for you. Typefeathrin the terminal to see the instructions.
If you get an error similar to “fatal error: ‘librdkafka/rdkafka.h’ file not found”, see the installing librdkafka section of this document.
CLI Usage
- Run
feathrin your terminal to see the instructions. - Run
feathr initto create a new workspace - Navigate to the new workspace
- Feathr requires a local engine packaged in the jar to test features locally. you can download the jar by
feathr start. - Run
feathr test, then type in a feature, like feature_a - After features are fully tested, you can create your training dataset by
feathr join. You can also materialize your features to online storage byfeathr deploy. - You can register your features to the metadata registry by
feathr register
Python Coding Style Guide
We use Google Python Style Guide.
Integration Test
Run pytest in this folder to kick off the integration test. The integration test will test the creation of feature dataset, the materialization to online storage, and retrieve from online storage, as well as the CLI. It usually takes 5 ~ 10 minutes. It needs certain keys for cloud resources.
Using Docker
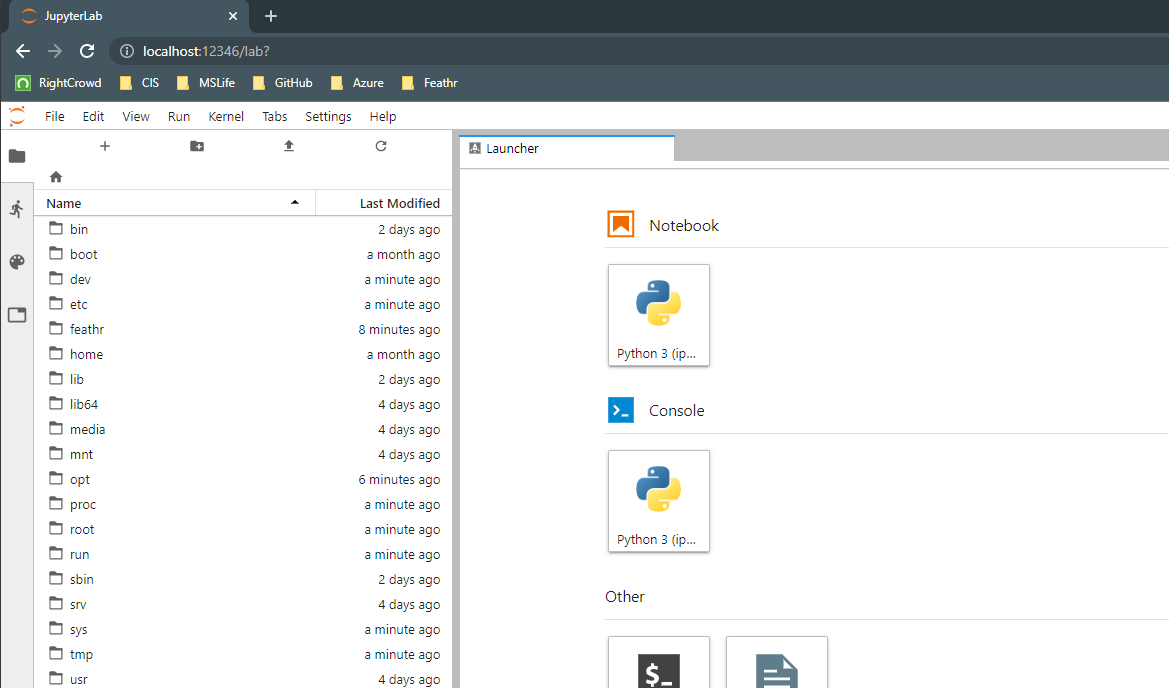
We provide a dockerfile with feathr installed, and with embedded vscode server, and jupyter lab. To build the docker, navigate to Feathr root folder, and use following command to build a docker file: docker build -t <Your Image Name> docker
Run the docker image with port mapping. 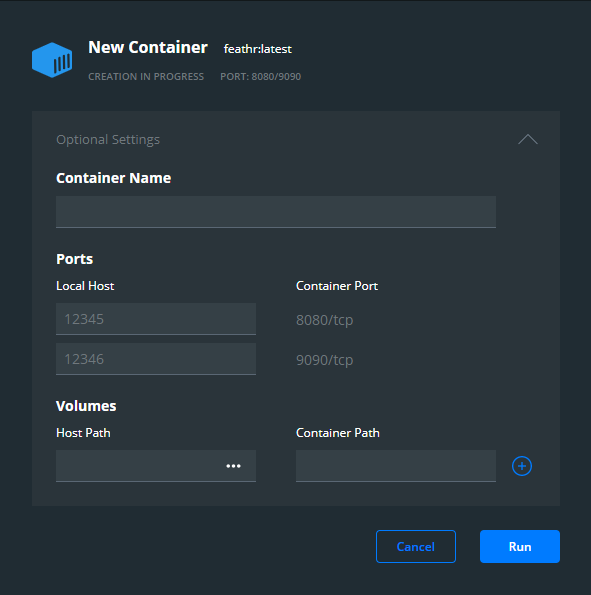
8080 : VsCode (default password is ‘feathr’)
9090: Jupyter Lab (default password is ‘feathr’)
With the docker image running, open your browser and access localhost:<your mapped port> to access apps. 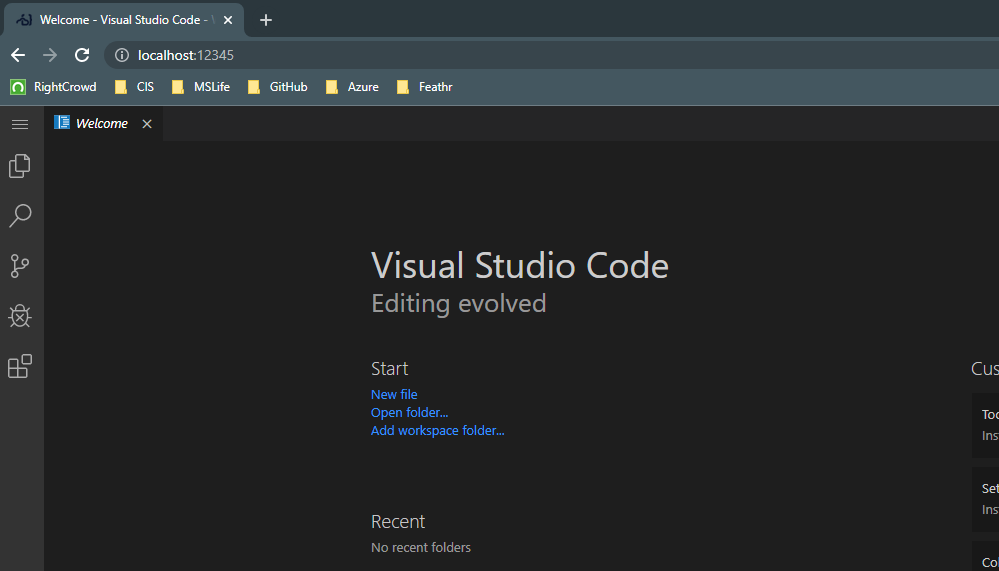
Using Virtual Environment
It’s recommended to use virtual environment for Python project development.
Using Python VENV
- Install virtualenv:
python3 -m pip install --user virtualenv - Make sure you are not using any other virtualenv(either Python or Conda) with:
deactivateorconda deactivate - Create virtualenv in
my_envfolder:python3 -m venv my_env. Use a unique name(heremy_env), so it doesn’t confuse with other virtual environments. - Activate
my_envvirtualenv:source my_env/bin/activate. - After activated, you should see your terminal started with
(my_env) - To confirm your virtual environment is working, you can type
which pythonand it should show python path is inmy_envfolder - Then follow Installation and Usage.
- To deactivate virtualenv: deactivate Ref: Installing packages using pip and virtual environments
Using Conda VENV
- To create an environment:
conda create --name myenv - To create an environment with a specific version of Python:
conda create -n myenv python=3.6 - To activate
yourenvname:conda activate yourenvname - Then follow Installation and Usage.
- To deactivate:
conda deactivateRef: Managing environments
Installing librdkafka
feathr assumes that you have the Apache Kafka C/C++ client library installed. To install it, follow the install instructions on the librdkafka home page.
For the Mac, if you get this error message when installing the project:
 fatal error: 'librdkafka/rdkafka.h' file not found
    #include <librdkafka/rdkafka.h>
             ^~~~~~~~~~~~~~~~~~~~~~
    1 error generated.
    error: command '/usr/bin/clang' failed with exit code 1
If this happens,
- Run
brew info librdkafka, and take note of the library install path (for example, “/opt/homebrew/Cellar/librdkafka/1.8.2/include”), - run
export C_INCLUDE_PATH=$LIBRDKAFKA_INCLUDE_PATH, where$LIBRDKAFKA_INCLUDE_PATHis the include path found in step 2. - Rerun the python setup install.